How to Capture Branded Cocktail Photos
May 16, 2022Every month Cocktail Camera Pro members participate in monthly photo challenges and share their work in our members-only forum. These challenges are pretty casual (there isn't usually a prize or even many rules) but it's a fun way for members to challenge themselves creativity and enjoy learning alongside fellow members by working on a similar project.
For May 2022 the challenge is capturing #BrandedCocktails. For beverage photographers, the majority of commercial clients are liquor brands that will want their product prominently featured in your imagery. It may sound simple (just put the bottle next to the drink, right?) but photographing glass objects that are often curved or have semi-reflective labels, is not always easy.
Brand clients will often supply photographers with specific guidelines on how they would like their product(s) to be photographed– so pay close attention to these details, especially for products with reflective labels or unique bottle designs.
In addition to any brand-supplied guidelines, here are some simple suggestions on how to best capture branded cocktail imagery.
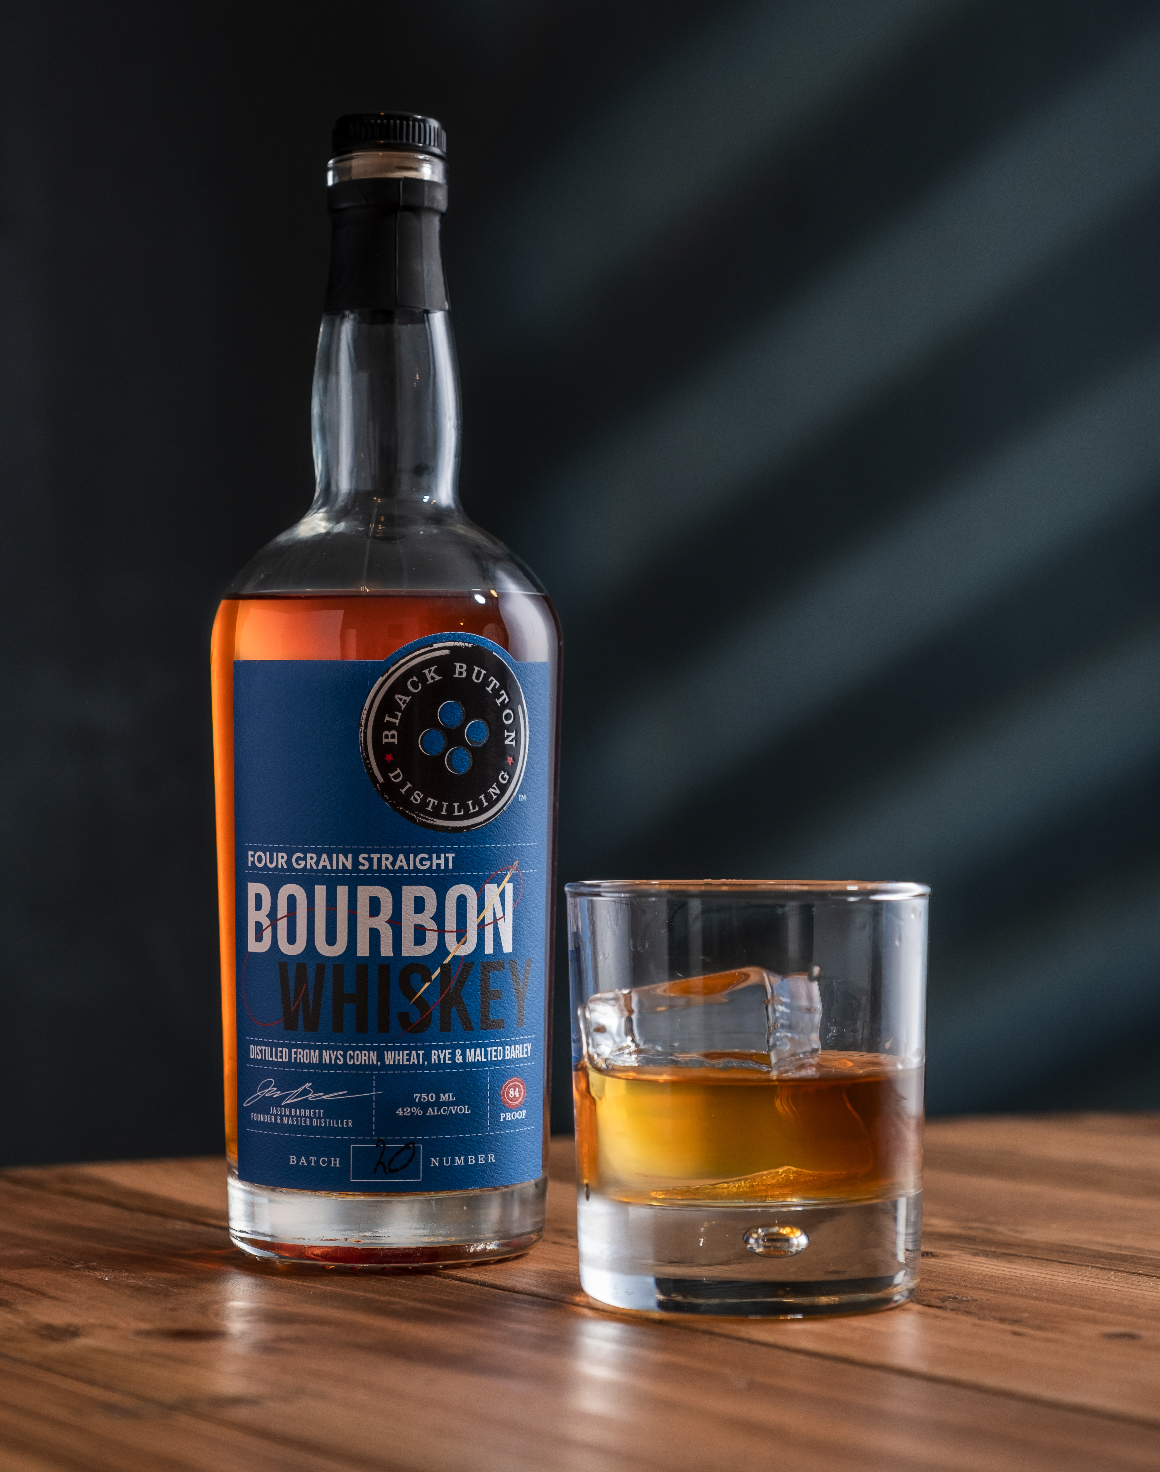
1. Place both the bottle and drink on the same focal plane

This is perhaps the most straight-forward approach to capturing both a beverage and a client product at the same time.
Shoot straight-on, from a low angle. This is a classic "hero shot" perspective that (when done well) makes your subject look more striking. In order for both the beverage and bottle to be sharp and in focus, make sure they are both aligned on the same focal plane. I.e. place them right next to each other as if they were arranged on a straight line that is perpendicular to your camera lens. If you place the bottle slightly behind the cocktail, it's more likely that the bottle will appear slightly out-of-focus due to depth of field.
Depth of field can be a nice look, giving you that soft background with a tack-sharp subject, but brand clients generally do not want their product to appear blurry in any way. Even if the drink is the main subject of your image, you still need the product to be clear and legible without any blur whatsoever. If you place both the bottle and beverage on the same "line" or focal plane, they should both appear crisp even at large apertures.
2. Shoot at a smaller aperture to broaden the focus area

If you have a different composition in mind, or simply want a more dynamic look than just placing both the beverage and product on the same focal plane, consider closing down your aperture to reduce depth of field.
Shooting at really large apertures (like f/1.4 or 1.8 and even up to f /5.6 sometimes) is what gives you that shallow focus area, where the subject is sharp and the background is blurry. However, if you want to place the product behind the cocktail, which often looks the most natural, you won't be able to shoot at a really wide aperture because the focus area is so thin, blurring out the product. You can adjust your shooting angle, aiming your camera down at the subject from more of a 45 degree angle, as this can help capture both the cocktail and some elements behind it. However, it's also beneficial to close down your aperture to a smaller F-stop. This will give you a much wider focus area, allowing you to get more of your beverage and product in focus.
Closing down your aperture does mean less light will be able to enter your lens for a proper exposure, so using off-camera flash or some sort of additional lighting is strongly recommended. Learning how to use artificial lighting is something we cover in-depth in the Cocktail Camera Pro course.
3. Composite Multiple Images in Photoshop

This is more of an intermediate to advanced technique, but sometimes it is the best approach for branded imagery in order to get the most detail in the image as possible.
Compositing involves taking multiple photos and combining them in Photoshop. This allows you to focus on specific elements of an image. For example, in the image above I used a silver card to make the glass of whiskey "glow" then I can edit out the card by combining it with a shot of the bottle. I can also make the bottle itself "glow" using the same method, making it look more inviting and eye-catching (see finished composite below).
Composting also allows you make sharp images of products on different focal planes. With this example above, the bottle is slightly behind the glass. I don't have to worry about depth of field though because I can take an image of the bottle being in focus and combine it with another shot of the glass in focus (this method is called "focus stacking" which will be the topic of a future blog post).
Composting might sound intimidating at first but I have a FREE tutorial available on YouTube showing you an easy way to approach it (click here).
Want to take your beverage photography to the next level? Check out Cocktail Camera Pro – the first e-course dedicated exclusively to mastering beverage photography
Download the Free Guide
Join our mailing list to stay updated with new photography tips and tutorials, and receive Jordan's free guide: Five Tips to Improve Your Beverage Photography
We hate SPAM. We will never sell your information, for any reason.